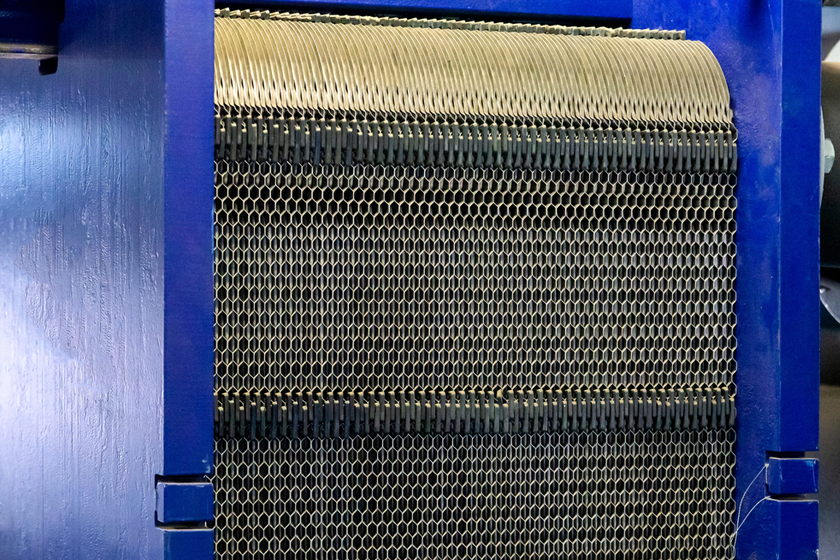
A plate-type heat exchanger (PHE) delivers high thermal efficiency in a compact footprint, but its narrow channels make it sensitive to fouling. Scale, biofilm, polymers, and oil films restrict flow, raise pressure drop, and erode heat transfer.
Regular, methodical cleaning restores performance, stabilizes energy use, and extends asset life. This guide explains how to clean plate-type heat exchanger systems with a structured workflow that balances safety, speed, and repeatability.
Know Your Fouling: Diagnose Before You Start
Every PHE tells a story in its data. Trending pressure drop, approach temperature, and pump power give clues about fouling type and severity.
A rising pressure drop at steady load points to particulate or biological plugging, while a widening temperature approach suggests insulating films such as scale or organic deposits. Match the cleaning plan to the suspected foulant to avoid wasted time and unnecessary chemical exposure.
Prep: Safety, Isolation, and Documentation
Begin with a disciplined shutdown. Isolate the exchanger, tag out energy sources, and depressurize. Allow the unit to cool to a safe handling temperature.
Drain both sides completely to prevent cross-contamination and spills. Document the as-found condition: plate count and arrangement, gasket type, tightening dimension, and any previous repairs. Photos of the frame, nozzle connections, and plate pack help with reassembly and troubleshooting.
Method Selection: CIP, SIP, or Full Disassembly
There are three primary pathways for how to clean plate-type heat exchanger systems:
- Clean-in-place (CIP): Recirculates chemistry through the assembled exchanger. Best for routine maintenance and light to moderate fouling. Minimizes handling and downtime.
- Soak-in-place (SIP): Static chemical exposure followed by recirculation and rinse. Useful for stubborn scale or organics that need dwell time.
- Full disassembly: Plates are removed for manual cleaning, inspection, and leak testing. Choose this for heavy fouling, mixed deposits, or when gaskets need replacement.
Select the least invasive method that achieves the required cleanliness, balancing turnaround with risk.
Chemistry 101: Match Deposit To Detergent
- Mineral scale (calcium carbonate, magnesium salts): Use inhibited acidic cleaners formulated to dissolve carbonates while protecting stainless steel plates. Avoid aggressive acids that attack base metal or gaskets.
- Biological fouling and slime: Alkaline detergents with surfactants and a compatible biocide break biofilm and disperse residues.
- Oils, polymers, and organic films: Emulsifying alkaline cleaners or solvent-assisted alkaline blends lift hydrophobic layers from plate surfaces.
- Mixed fouling: Sequence matters. Often, an alkaline stage is first used to remove organics and expose mineral scale, followed by an inhibited acid stage to clear remaining deposits.
Always verify compatibility with plate metallurgy and gasket elastomers, and follow manufacturer recommendations for concentration and temperature.
Step-By-Step: Clean-In-Place (CIP)
- Isolate and drain: Close inlet/outlet valves, vent, and drain both circuits. Capture effluent for proper disposal.
- Circuit setup: Connect a CIP skid or temporary loop with a chemical-resistant pump, heater (if needed), and inline filtration. Use flexible hoses sized to maintain turbulent flow.
- Pre-rinse: Recirculate clean water to flush loose debris. Monitor discharge clarity.
- Alkaline wash: Charge the loop with the chosen alkaline cleaner at the recommended concentration. Heat to the target temperature for better kinetics. Recirculate until pH and conductivity stabilize and effluent appears uniform.
- Intermediate rinse: Rinse to near-neutral pH to prevent neutralization in the next step.
- Acid descaling: Dose inhibited acid for scale removal. Maintain temperature and flow. Keep an eye on gas evolution and pH drift as scale dissolves.
- Final rinse: Flush thoroughly until pH is near neutral and conductivity meets site limits. Consider a passivation rinse if recommended for the alloy.
- Biocide polish (as applicable): For systems prone to biofouling, circulate a compatible biocide briefly, then perform a final water rinse.
- Dewater and dry: Drain completely. If available, use low-pressure dry air or nitrogen to purge residual moisture.
- Record and dispose: Document chemical volumes, temperatures, dwell times, and observations. Handle spent solutions per environmental and safety requirements.
Step-By-Step: Full Disassembly Cleaning
- Mark and measure: Record the tightening dimension and plate sequence. Use alignment marks to maintain the original flow pattern.
- Loosen and remove: Back off frame bolts evenly to avoid plate distortion. Remove the plate pack to a clean work area with protective padding.
- Inspect gaskets: Check for swelling, cracks, creep, or chemical attack. Replace any suspect gaskets. Avoid sharp tools that nick sealing lands.
- Clean plates: Use low-pressure spray, soft brushes, and compatible chemicals. Avoid abrasive pads that alter surface finish. For scale, immerse plates in inhibited acid baths; for oils, use an alkaline stage first. Rinse plates thoroughly between chemistries.
- Check plates for defects: Hold each plate to light to spot pinholes, thinning, or dents. Dye penetrant testing can reveal hairline leaks.
- Re-gasket as needed: Bond or clip new gaskets as per the manufacturer's instructions. Allow adhesive systems to cure fully before assembly.
- Reassemble: Stack plates in the correct orientation and pattern. Tighten evenly to the specified compression dimension, maintaining parallelism across the frame.
- Hydrotest: Pressure test at the recommended level to verify sealing. Inspect for cross-leakage or external seepage before putting the unit back in service.
Flow, Heat, and Time: The Cleaning Kinetics Triangle
Three levers drive effective PHE cleaning. Flow creates shear, stripping deposits from corrugations. Heat accelerates reaction rates and lowers viscosity for better wetting.
Time allows chemistry to work, but diminishing returns set in; step changes in pH, conductivity, or turbidity indicate when a stage is complete. Aim for turbulent recirculation, controlled temperature bands, and documented dwell times for consistent outcomes.
Filtration and Sludge Management
During CIP, fouling detaches in stages. Inline strainers and bag filters prevent re-deposition downstream and reduce pump wear. Start with a coarser filter and ratchet down to finer media as discharge clears.
For heavy mineral loads, plan for periodic filter changes and sludge handling; this keeps pressure drop in the loop stable and shortens total cleaning time.
Drying and Restart
Residual moisture dilutes process fluids and may carry dissolved chemistries back into the system. After the final rinse, drain thoroughly and purge with dry air or nitrogen at low pressure.
Ensure that vent paths and low points are clear. On restart, monitor pressure drop, approach temperature, and initial effluent for any signs of carryover. A brief, controlled warmup helps plates seat and gaskets conform under load.
Talk to the Heat Exchanger Specialists
Baron Blakeslee is the exclusive North American distributor for Spirec cylindrical-plate heat exchangers: compact, welded, all-stainless designs with no gaskets, low pressure drop, and enhanced turbulence for efficient heat transfer.
Since 1920, our team has supported industrial operations with American-made systems, technical guidance, and responsive service. Looking to improve thermal performance, reduce fouling risk, or spec a replacement unit? Let’s discuss sizing, configuration, and integration for your process. Ready to start? Contact us to begin a consultation.